How to Build Your First Home Wine Cellar: A Beginner’s Guide
Whether you’re a budding wine enthusiast or a curious collector, creating your own home wine cellar is one of the most rewarding ways to enjoy and preserve your favorite bottles. You don’t need a mansion or underground cave to start just a little planning, basic knowledge, and a passion for wine.
In this beginner-friendly guide, we’ll walk you through everything you need to know to set up a functional and stylish home wine cellar from choosing the right space to organizing your collection and keeping your bottles in peak condition.
Why Start a Home Wine Cellar?
Building a wine cellar isn’t just about storage. It’s about:
- Preserving wine quality over time
- Collecting rare or age-worthy bottles
- Having easy access to wine for meals, guests, and celebrations
- Learning more about your own wine preferences
- Saving money by buying in bulk or during sales
Even if you’re starting with just a few bottles, a wine cellar (or a well-thought-out wine storage system) can elevate your wine experience significantly.
Step 1: Choose the Right Location
The key to storing wine is consistency. Wine is sensitive to temperature changes, light, humidity, and vibration. When choosing a spot in your home, look for a location that is:
- Cool and stable: Ideal temperature is 12–16°C (55–60°F)
- Dark: Avoid direct sunlight or strong indoor lighting
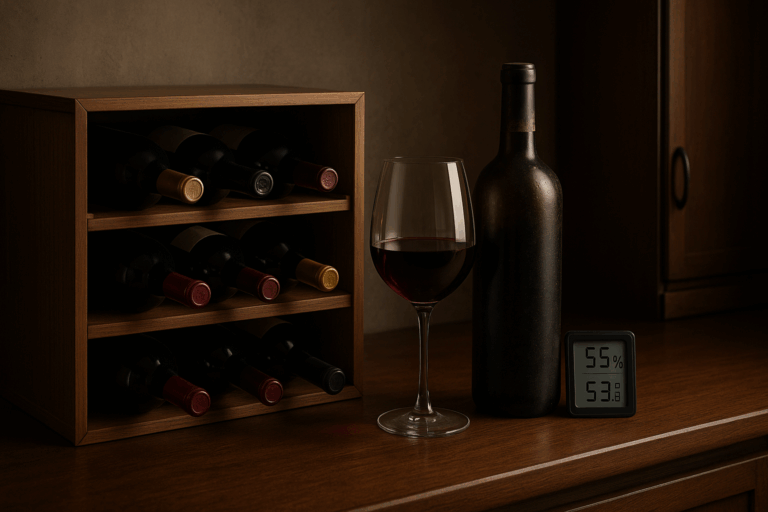
- Moderately humid: Aim for 50–70% humidity to protect corks
- Vibration-free: Avoid areas near washing machines or speakers
Good locations include:
- A basement or garage (if well insulated)
- A walk-in closet or unused pantry
- A corner of a cool, interior room
- Under the stairs with ventilation added
Avoid kitchens, laundry rooms, or anywhere with frequent temperature swings.
Step 2: Choose Your Storage System
You don’t need a full-scale cellar to get started but proper racking or shelving is important to keep bottles safe and accessible.
Common options include:
🪵 Wooden or metal wine racks
- Great for aesthetics and long-term aging
- Easy to expand as your collection grows
🧊 Wine fridges or coolers
- Maintain exact temperature and humidity
- Ideal for apartments or small spaces
- Some models offer dual zones for red and white wines
🧱 Custom-built cellars or cabinets
- Designed for serious collectors
- Often include insulation, temperature control, and humidity systems
Start small, but leave room for growth once you begin collecting, it’s easy to outgrow your first rack!
Step 3: Understand Wine Storage Basics
To protect your wine, follow these key guidelines:
🔄 Store Bottles Horizontally
Especially for wines with corks horizontal storage keeps the cork moist, preventing air from entering the bottle.
🌡️ Maintain Stable Temperature
Fluctuations are worse than a wine being slightly too warm. Avoid drastic swings that “shock” the wine and age it prematurely.
💡 Avoid Light
Sunlight (and even some artificial light) can damage wine by causing chemical reactions. Keep bottles in the dark whenever possible.
💧 Control Humidity
If the air is too dry, corks can shrink. Too humid? Mold may grow. Aim for 60–70% humidity, and consider a small humidifier in dry environments.
📦 Don’t Move Bottles Often
Vibration disturbs the sediment in aging wine and alters flavor development. Store bottles where they can rest undisturbed.
Step 4: Start Building Your Collection
It’s tempting to fill your cellar with expensive wines right away, but variety and balance are key.
Tips for beginners:
- Start with 10–20 bottles: a mix of reds, whites, rosés, and sparkling
- Include everyday wines and a few special-occasion bottles
- Experiment with different regions and grape varieties
- Learn what you like — and what you don’t
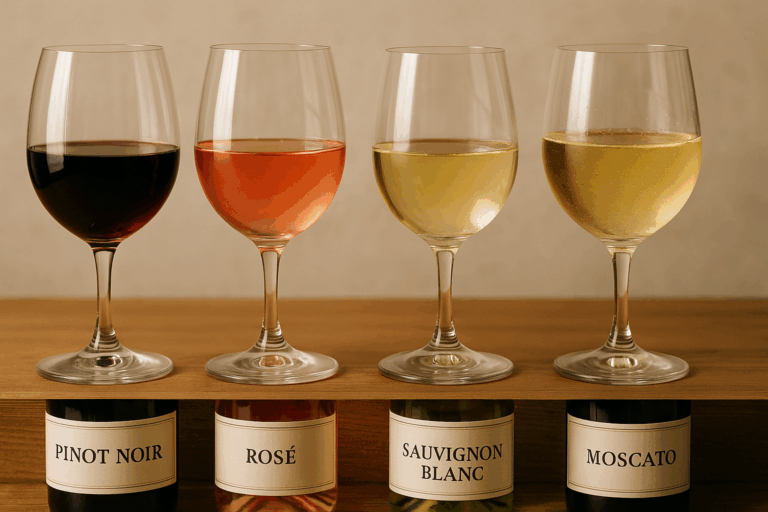
A sample starter mix might look like:
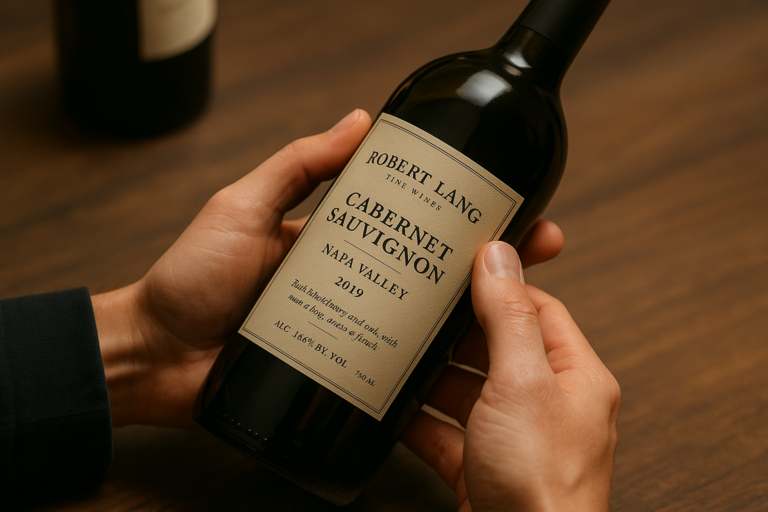
- 4 bottles of red (Cabernet, Pinot Noir, Syrah, Merlot)
- 3 bottles of white (Chardonnay, Sauvignon Blanc, Riesling)
- 2 bottles of rosé
- 1–2 bottles of sparkling wine
- 2–3 age-worthy wines to open in the future
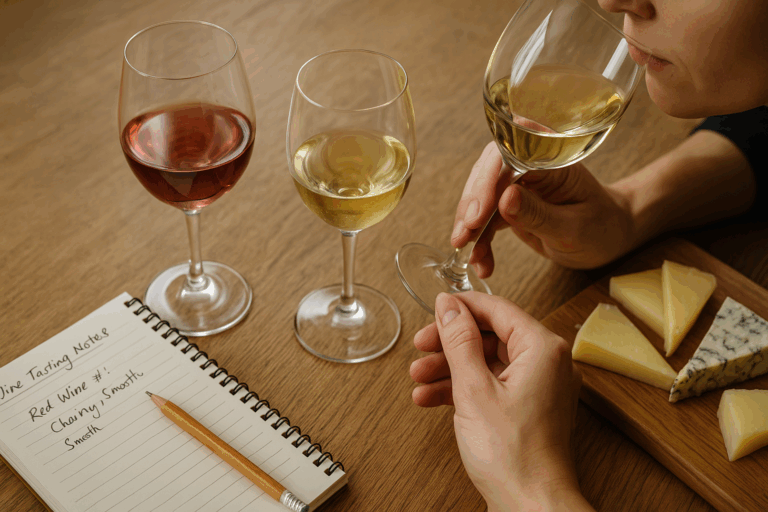
Step 5: Keep Track of Your Inventory
It’s easy to lose track of what you own, especially once your collection grows. Use an inventory system to stay organized.
Ways to track your wines:
- Spreadsheets: Simple, customizable, and searchable
- Wine apps: Vivino, CellarTracker, and Vinocell offer mobile tracking, ratings, and cellar management
- Notebook or journal: A tactile way to track tasting notes, aging dates, and pairings
Be sure to note:
- Purchase date
- Drink-by date or aging potential
- Price and source
- Tasting notes
- Pairing suggestions
Step 6: Learn When to Drink and When to Age
Not all wines benefit from aging. Most wines especially under $30 are made to be enjoyed within 1–3 years of release.
Wines that can improve with age:
- Full-bodied reds (Barolo, Bordeaux, Rioja Reserva)
- High-acid whites (Riesling, Chenin Blanc, Chardonnay)
- Fortified wines (Port, Sherry)
- Vintage Champagne
If in doubt, do some research or ask your local wine merchant. And remember there’s no shame in drinking wine early if that’s when you enjoy it most.
Bonus: Decor and Design Ideas
A wine cellar doesn’t have to be purely functional — it can also be beautiful and personal.
Design elements to consider:
- Wooden shelves with warm lighting
- A chalkboard for notes or food pairings
- Wine-themed art or vintage posters
- A small tasting table or bench
- Ambient lighting with dimmers to protect bottles
Even in small spaces, a well-designed wine area can add sophistication and warmth to your home.
Final Thoughts: Start Small, Grow with Passion
You don’t need to be a sommelier or millionaire to enjoy your own wine cellar. What matters most is building a space that suits your lifestyle, protects your bottles, and enhances your enjoyment of wine.
Start with what you have, build gradually, and let your collection evolve with your palate. A wine cellar isn’t just storage it’s a journey, a hobby, and a celebration of taste.
So go ahead choose your space, chill your bottles, and toast to your very first home wine cellar.
Cheers to that!